
Deploy Community Edition with aaPanel
Deploying SurveyKing Community Edition using aaPanel is a simple process for users who are not familiar with command-line interfaces. You can deploy the v1.12.0 version of SurveyKing to your server in just a few steps using aaPanel.
Use Cases
- You already have a cloud server.
- You have installed aaPanel, or you plan to install it.
- You want to complete the deployment using a web interface and don't want to manually configure Java, MySQL, and startup commands.
Steps
1. Install and Open aaPanel
If you haven’t already installed aaPanel, you can access it from the following link to install:
After installation, save the aaPanel address, account, and password, as you will need them to manage your projects.
If you are using a cloud server, you also need to open port access for SurveyKing in your cloud service provider's security group.
2. Deploy Using the Official Application
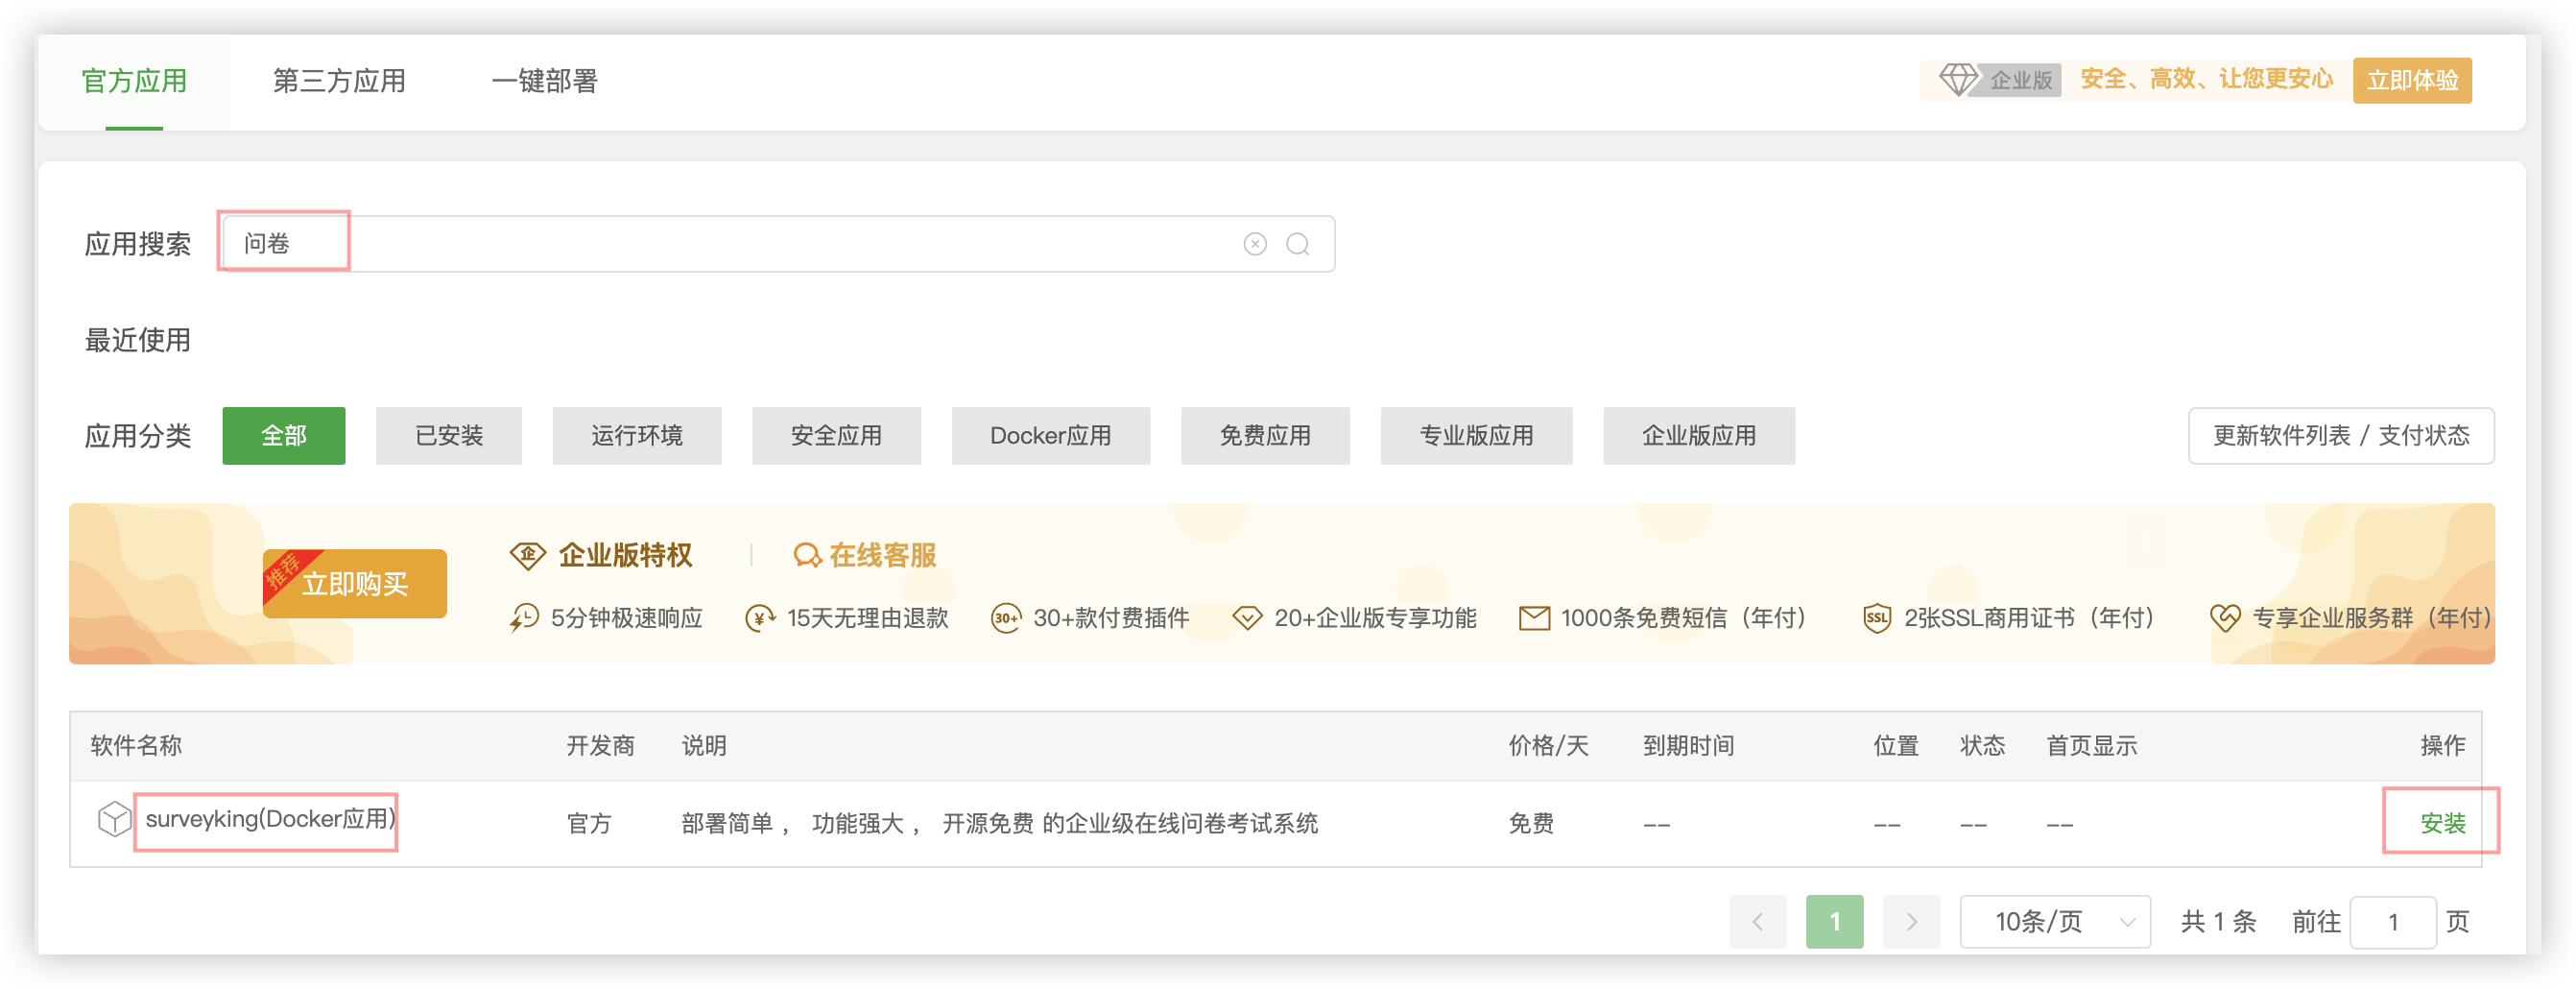
In aaPanel’s left sidebar, go to Software Store and search for Survey within the Official Applications section to find the SurveyKing application. Click Install.
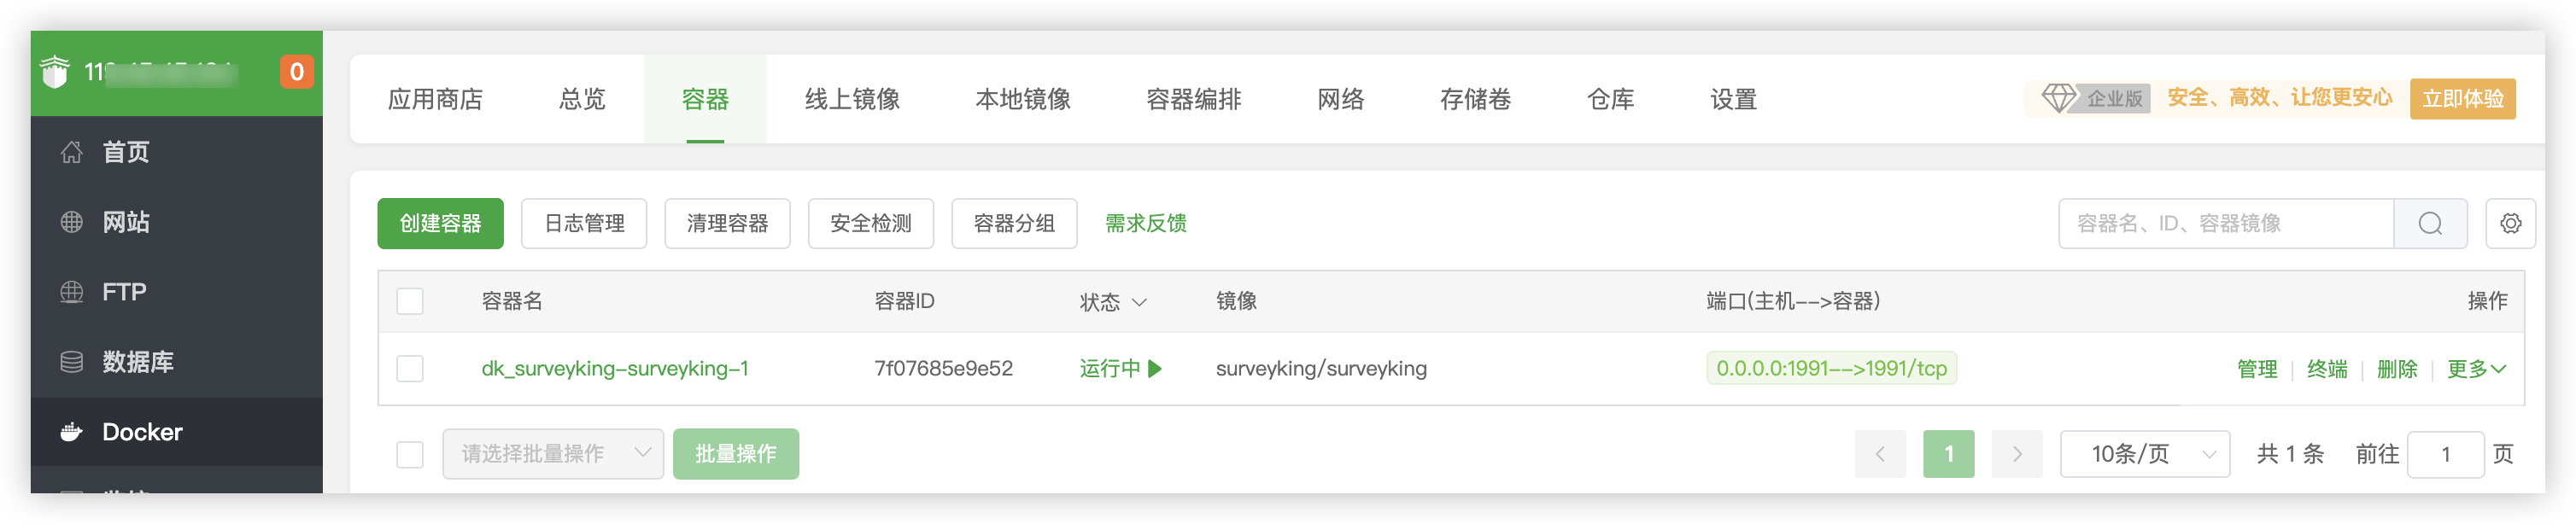
After installation, you will see the SurveyKing application in the Docker application list.
3. Access the Deployment Address
In the application details, find the deployment address and copy it to your browser to open.
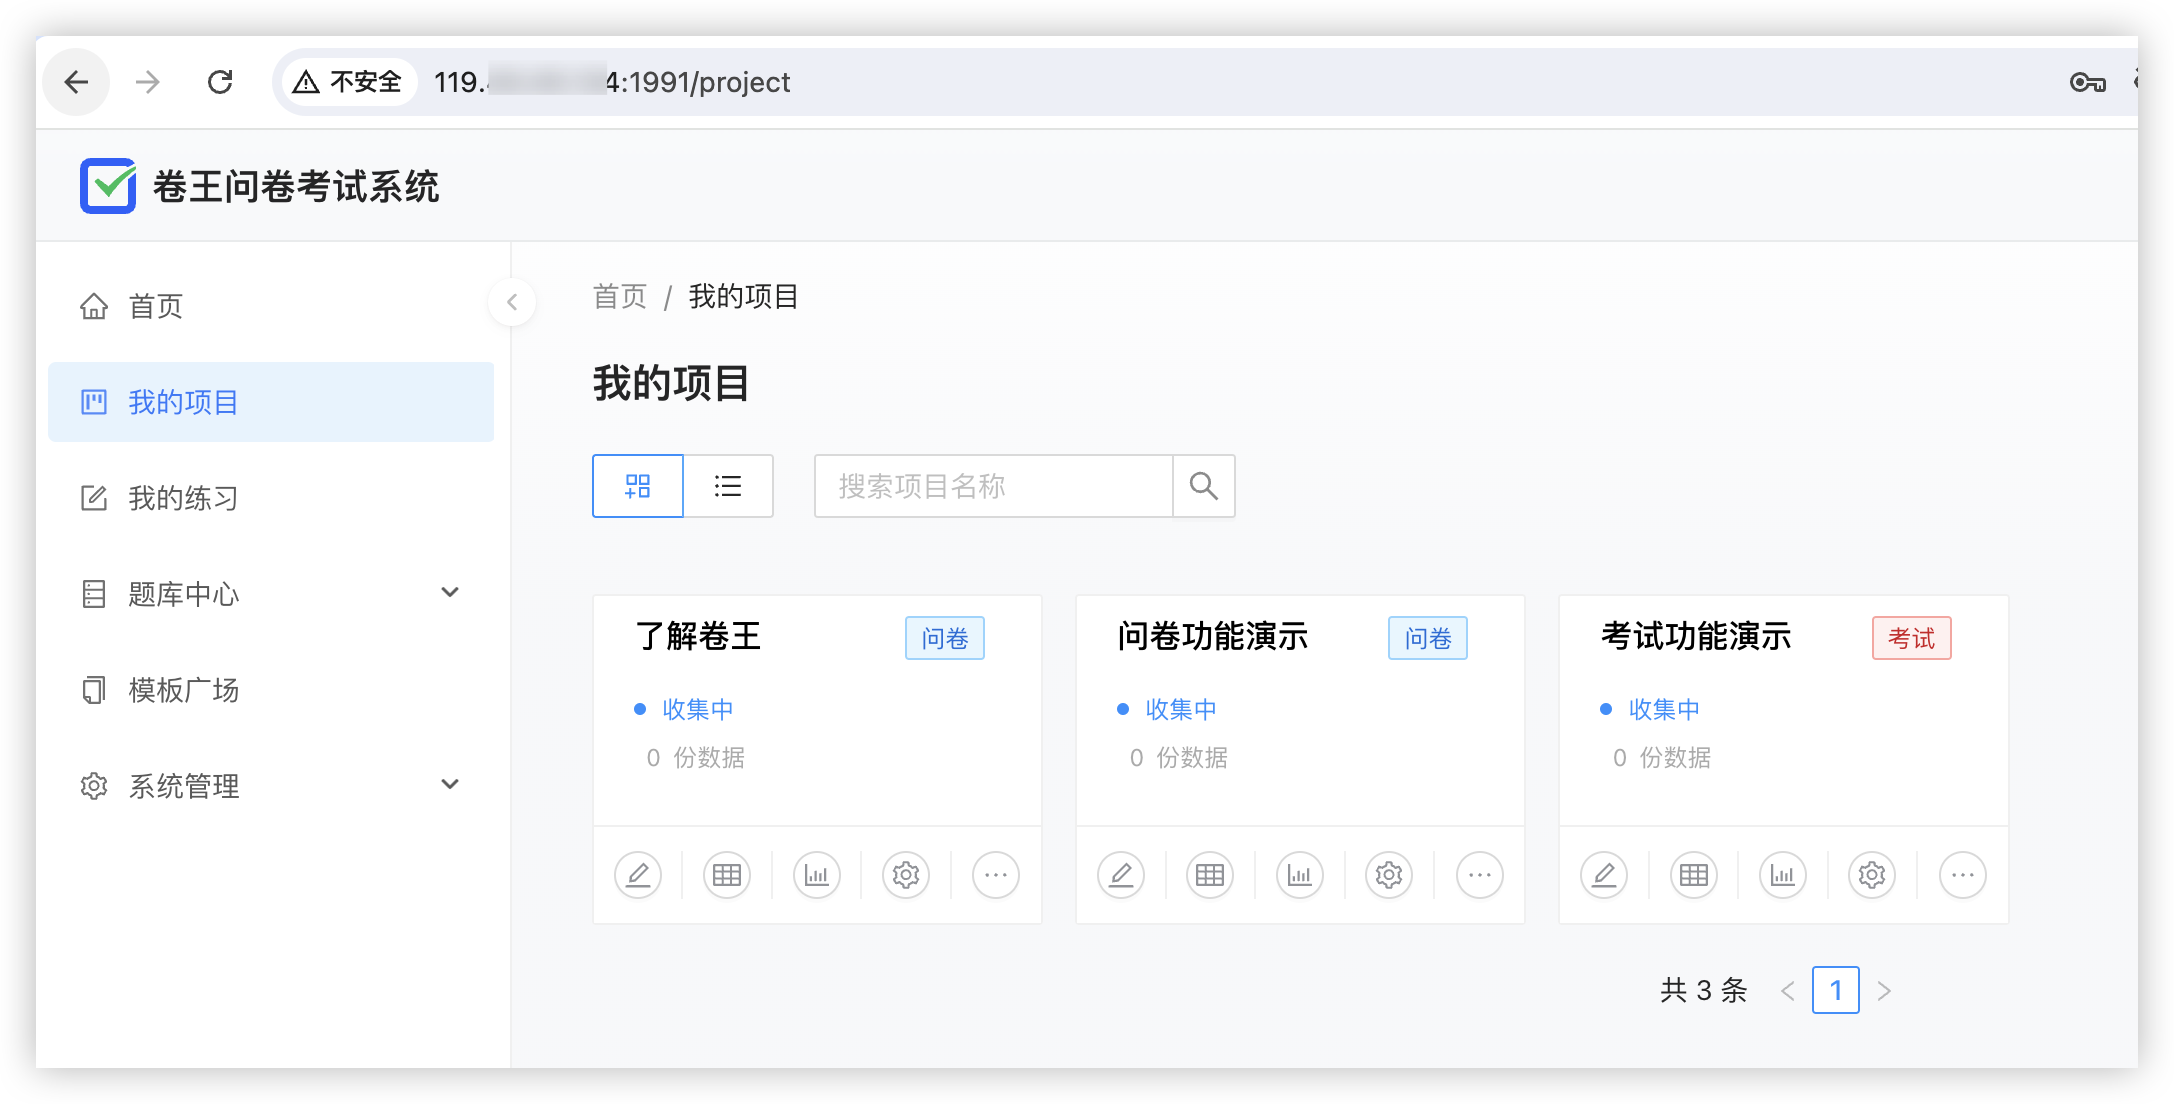
If you access the page for the first time, follow the initialization, backup, and upgrade instructions to complete the initialization.
If the application has already completed the initialization for you, it will directly enter the login page.
After your first login, go to System Management → Personal Settings → Security Settings to modify your password.
Alternative One-Click Deployment Method
If your aaPanel version does not have the Official Application, you can use the One-Click Deploy.
1. Search for One-Click Deploy
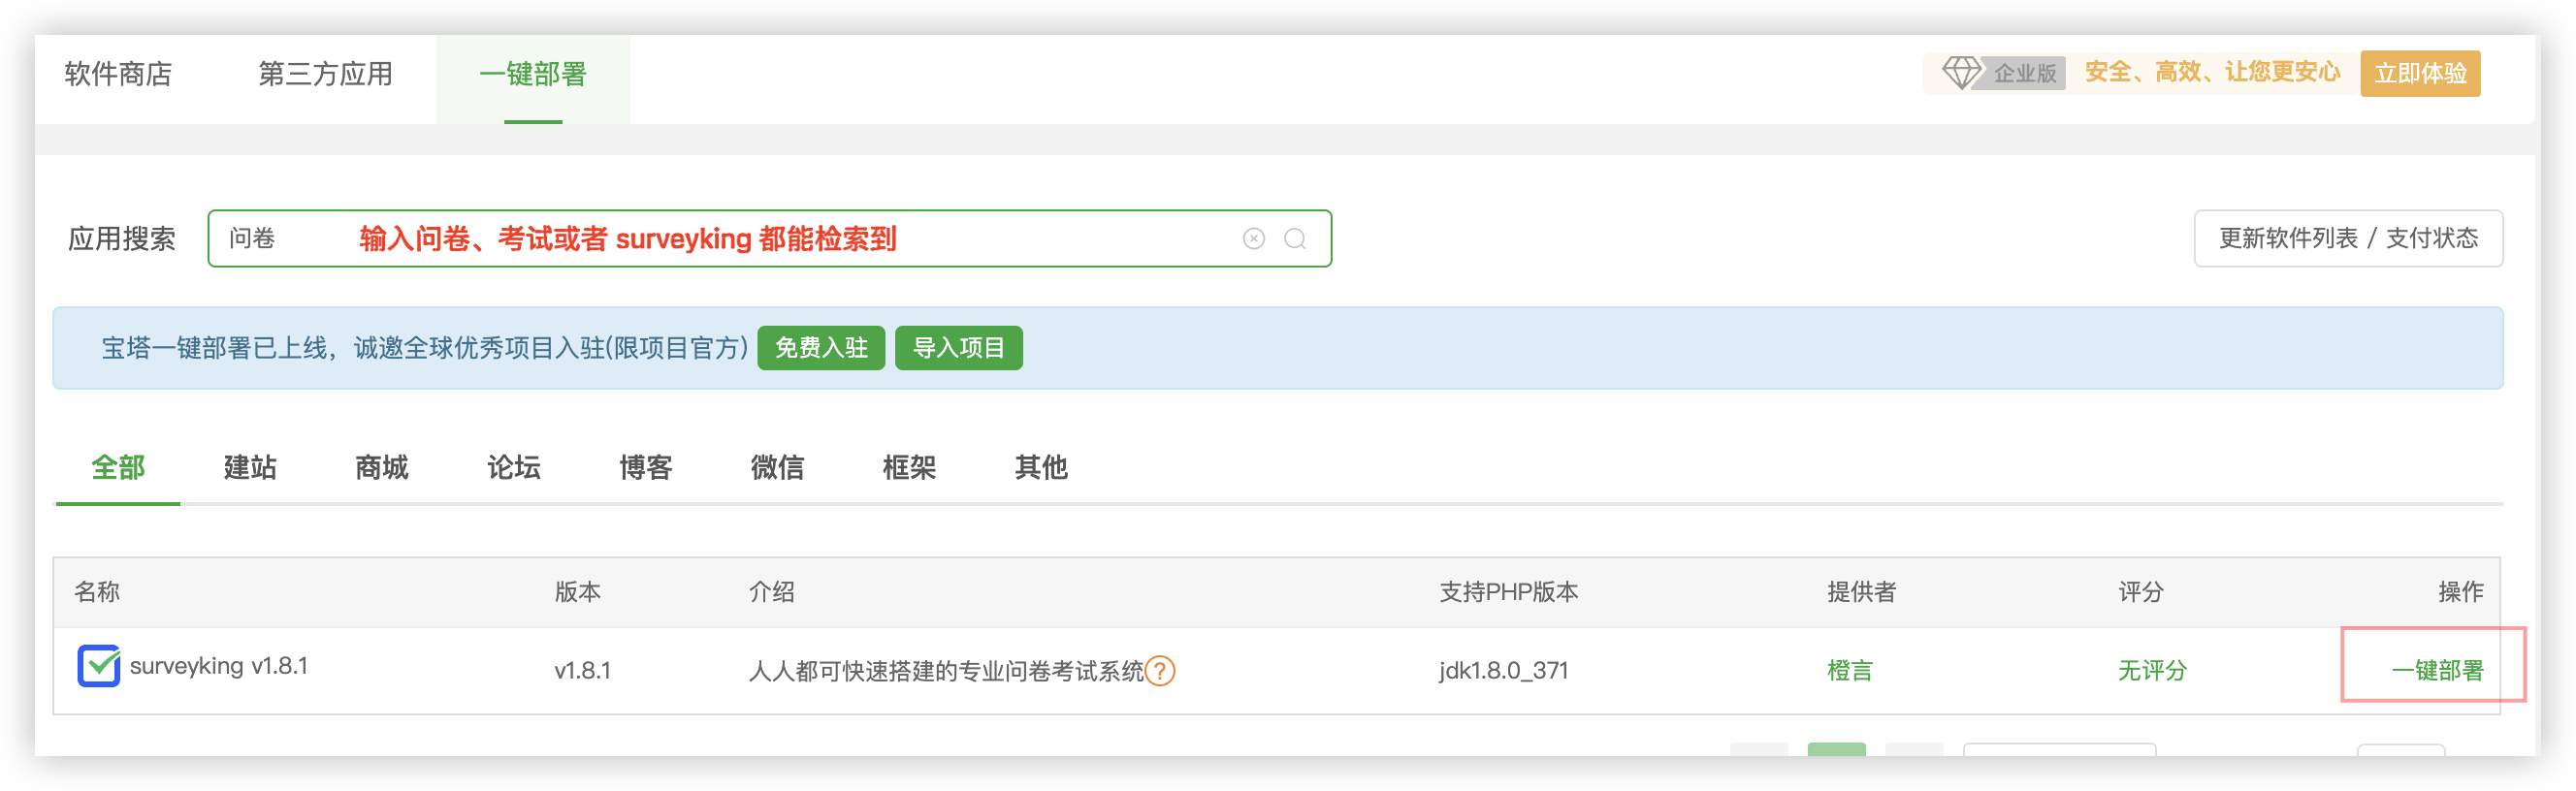
Go to Software Store → One-Click Deploy, search for Survey, and click One-Click Deploy.
2. Complete the Runtime Environment
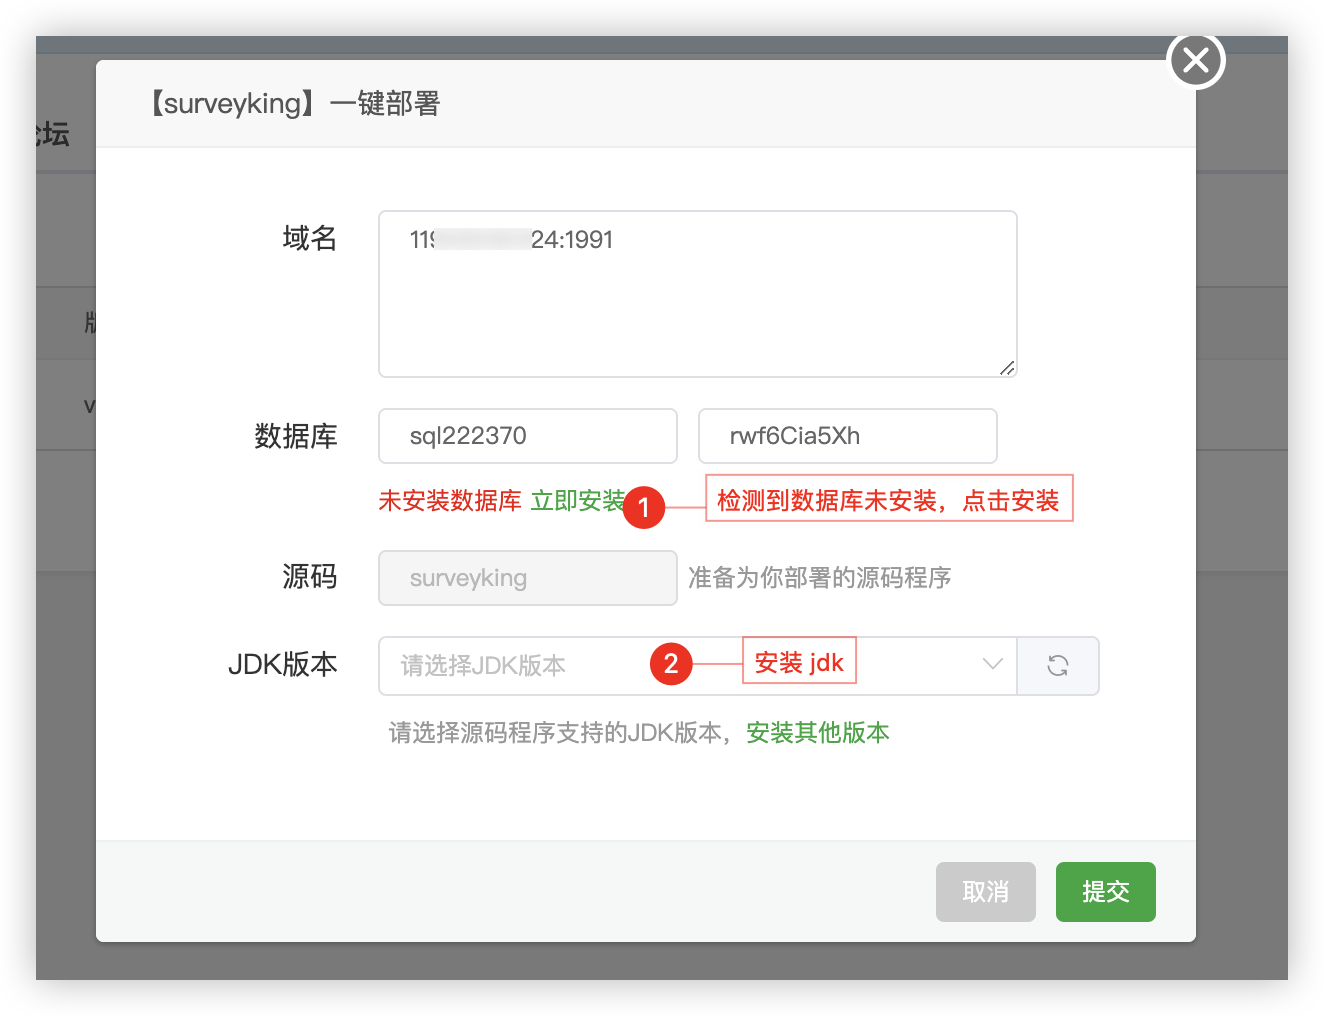
If aaPanel prompts you that MySQL, JDK, or Nginx are not installed, click Install Now to follow the instructions.
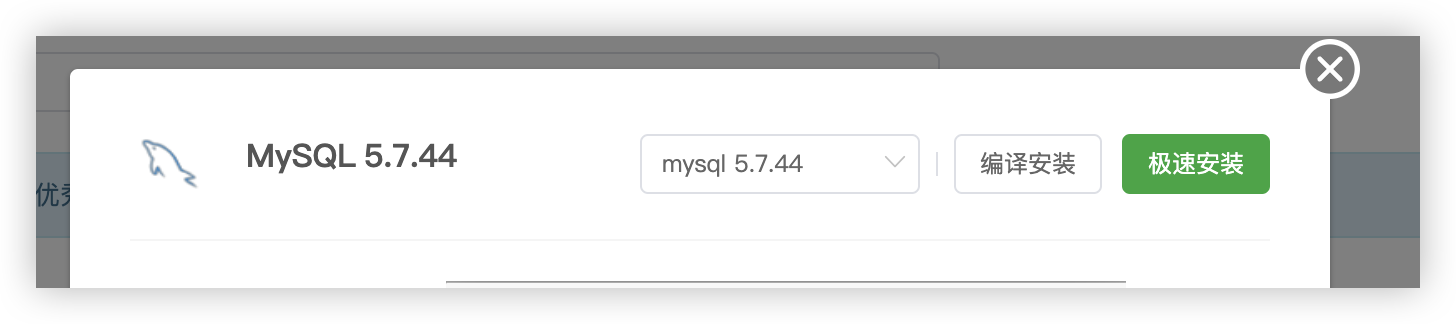
It is recommended to choose MySQL version 5.7 or 8.0.
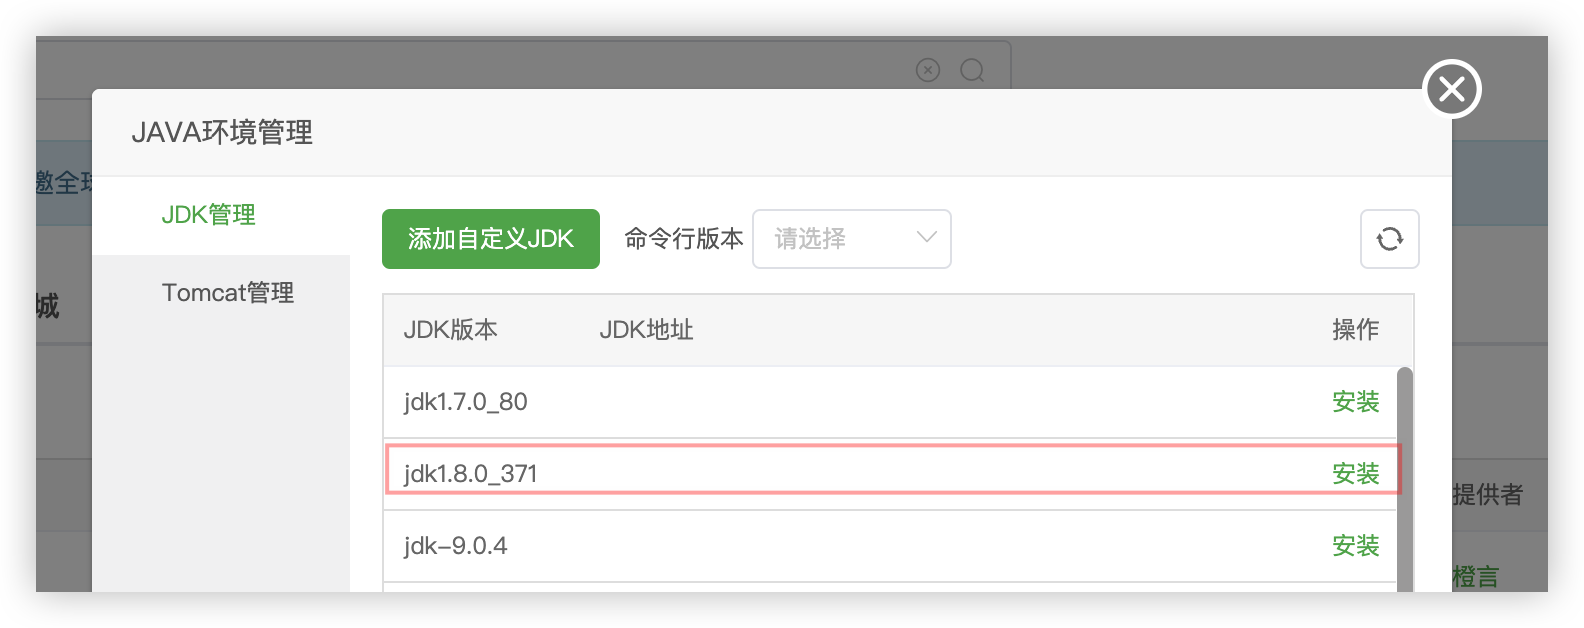
Select JDK jdk1.8.0_371 or the JDK 8 provided by aaPanel.
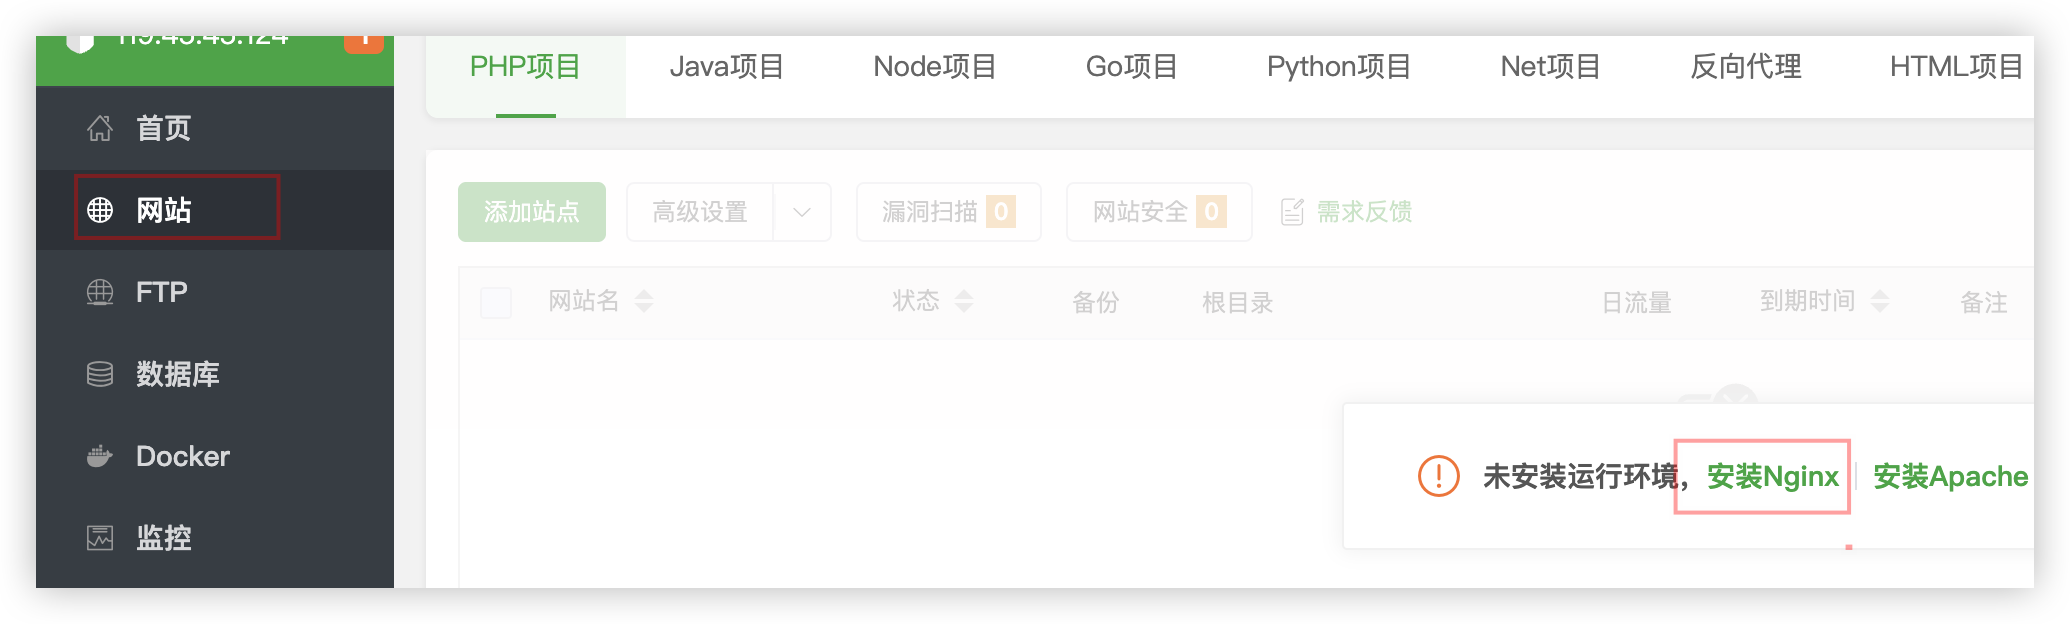
You can search for Nginx in the Software Store and click Quick Install to install it.
3. Manage the Application
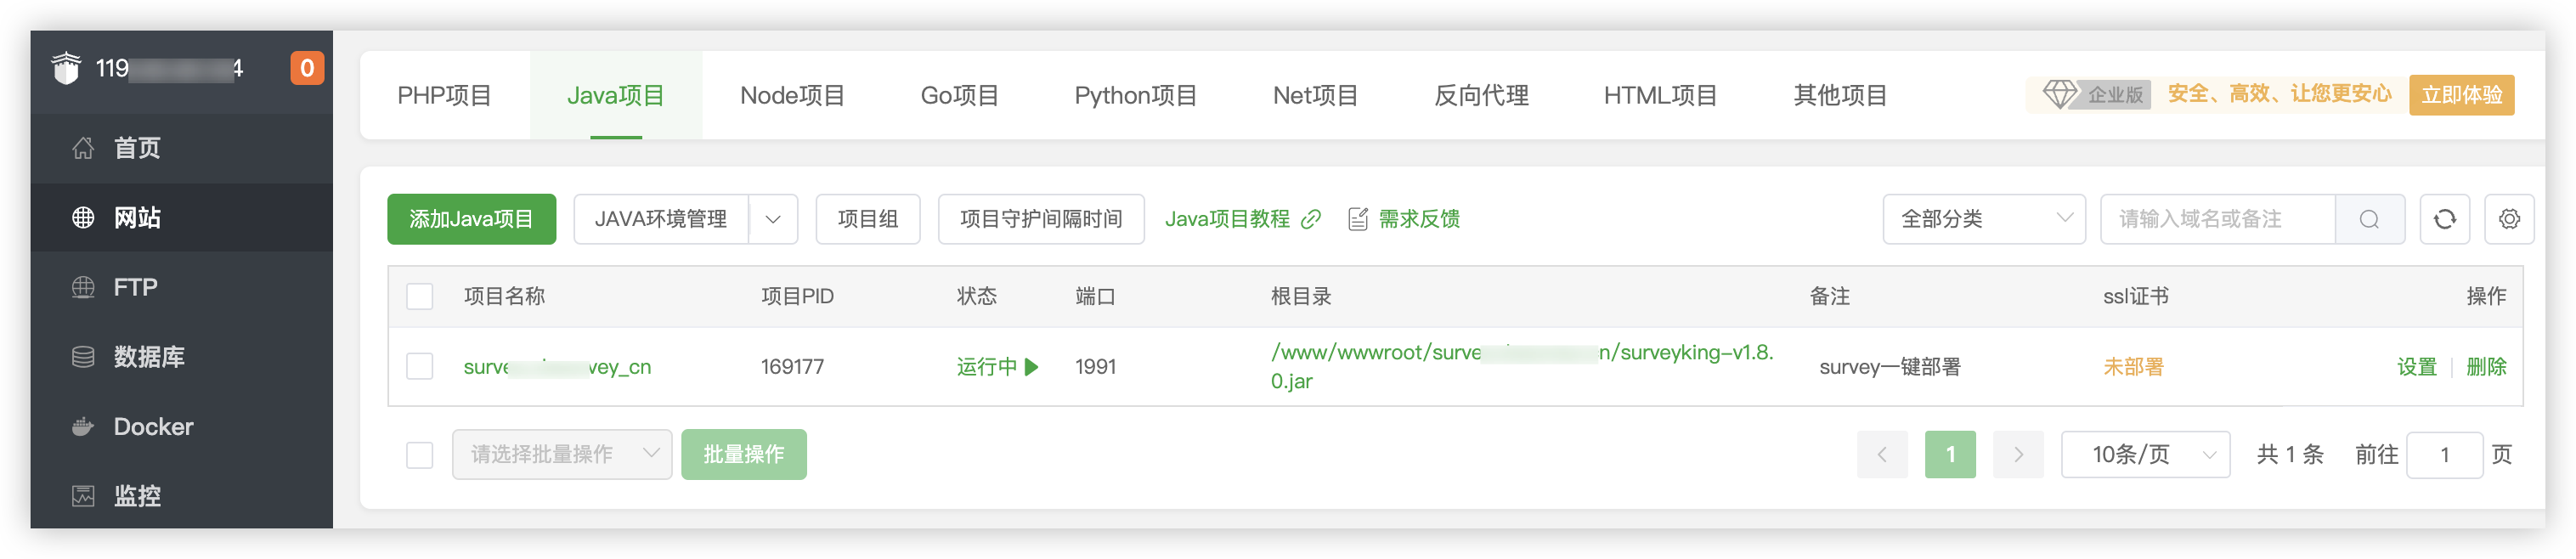
After deployment, go to Website → Java Project to see the SurveyKing project.
Frequently Asked Questions
Why does it enter /setup when I open it?
This is the initial setup page for v1.12.0. Follow the initialization, backup, and upgrade instructions to complete the initialization after which the system will enter the login page.
If you choose MySQL, the application may automatically restart after initialization; just refresh the page a little later.
Which should I choose: Official Application or One-Click Deploy?
Choose the Official Application first. It’s closer to Docker Compose deployment, with fewer dependencies, and it's easier to migrate and maintain in the long run.
If your aaPanel version doesn’t have the official application, then choose One-Click Deploy.
Why can’t my mobile phone access localhost:1991?
localhost only refers to the current device.
When deploying to a cloud server, you can access it from your mobile phone using:
http://server_public_ip:1991
Replace 1991 with the actual port if it’s different in aaPanel.
What should I do if the browser cannot open the access address?
Check the following:
- Is the SurveyKing application running in aaPanel?
- Does your cloud service provider's security group allow access to the SurveyKing port?
- Does aaPanel or your system firewall allow access to the SurveyKing port?
- Does the port number in the deployment address match the port number of the aaPanel project?
What should I do if the default account and password cannot be logged in?
First, make sure the application has been fully started. It may take a little time for MySQL initialization to complete.
If you still can’t log in, check the application logs for database connection errors or initialization failures.
How do I upgrade?
First export a backup, then update the application or redeploy the new version. See the initialization, backup, and upgrade instructions for details.